Can Homeowners Successfully Handle Garage Door Installation?
The allure of do-it-yourself (DIY) projects often beckons homeowners seeking to save costs and delve into the realm of home improvements. Yet, amidst the array of feasible tasks, the question lingers: Can homeowners successfully handle the intricate endeavor of garage door installation? This question encapsulates a multifaceted exploration into the complexities and considerations surrounding the installation process.
Garage door installation transcends the realm of mere handy work, encompassing a blend of mechanical precision, structural comprehension, and safety protocols. It involves orchestrating a symphony of components, each with its place and function within the intricate framework of the system. From tracks and panels to springs and cables, every element plays a pivotal role in the door's operation, demanding meticulous attention to detail and technical finesse.
The
feasibility of DIY garage door installation hinges not just on enthusiasm but also on various critical factors. Skill level, prior experience in handling mechanical installations, access to suitable tools and equipment, and an understanding of the installation process all weigh significantly in determining the likelihood of successful execution. Moreover, the inherent complexities of garage door mechanisms and the potential risks associated with incorrect installation further shape the viability of homeowners undertaking this task.
Assessing Readiness for DIY Installation
Embarking on a DIY garage door installation necessitates a keen evaluation of one's skills and experience in handling mechanical tasks. Consider the following:
- Assess your comfort and familiarity with mechanical tasks. Are you adept at assembling components, following technical instructions, and troubleshooting potential issues?
- Reflect on past experiences with similar DIY projects. Have you undertaken installations or repairs involving mechanical systems or heavy equipment?
- Evaluate your proficiency with common hand and power tools. Can you confidently and safely use tools like drills, wrenches, levels, and ladders?
Necessary Tools and Equipment for Installation
Successful garage door installation hinges on having the right tools and equipment at your disposal:
- Ensure you have a comprehensive set of basic tools, including screwdrivers, pliers, wrenches, and a hammer, necessary for assembling and securing components.
- Access to power tools such as a drill with various bits, socket wrenches, and a circular saw may expedite the installation process and ensure precision.
- Prioritize safety by acquiring safety goggles, gloves, and appropriate attire to safeguard against potential hazards during installation.
- Invest in a quality garage door installation kit that includes all required hardware, tracks, panels, springs, and cables specific to your door type and size.
Ensuring you possess the requisite skills and experience while having access to the necessary tools and equipment is fundamental in determining your readiness for a DIY garage door installation.
Understanding the Installation Process
Before delving into the installation process, it's crucial to comprehend the primary components that constitute a garage door system:
Door Panels:
These
panels form the main body of the door and are typically made of various materials like steel, aluminum, or wood.
Tracks:
The tracks provide a path for the door to follow during opening and closing. They guide the rollers attached to the door panels.
Rollers and Hinges:
Rollers attach to the door panels and move within the tracks. Hinges connect the door panels, allowing them to pivot during operation.
Springs and Cables:
Torsion or extension springs counterbalance the door's weight, while cables assist in lifting and lowering the door.
Hardware:
Bolts, nuts, screws, and other fasteners secure the components together.
Step-by-Step Guide to Installation
- Ensure the installation area is clean and free of obstructions. Clear any debris and create ample space for assembly.
- Start by assembling the horizontal and vertical tracks according to the manufacturer's instructions. Secure them firmly to the wall, ensuring proper alignment and levelness.
- Attach the rollers to the door panels and then insert them into the tracks. Ensure the panels are leveled and aligned correctly.
- Install and tension the springs and cables according to the door's specifications. Secure all hardware, ensuring proper connections.
- Manually open and close the door to test its operation. Make necessary adjustments to the tracks, springs, and hardware to ensure smooth and balanced movement. Conduct safety tests to ensure the door reverses upon encountering an obstacle.
Pros and Cons of DIY Installation
One of the primary attractions of a DIY approach to garage door installation is the potential for significant cost savings. By bypassing professional labor costs, homeowners can allocate their budget toward purchasing quality materials and tools required for the installation.
Undertaking a DIY project presents a valuable learning opportunity. It allows individuals to acquire new skills, understand the mechanics behind a garage door system, and familiarize themselves with the installation process. This hands-on experience can foster a sense of empowerment and confidence in handling home improvement projects.
DIY installations offer homeowners the flexibility to work at their convenience, setting their own schedule for the project. It provides the liberty to make decisions based on personal preferences, ensuring the installation aligns with specific design or functional needs.
Successfully completing a DIY garage door installation brings a unique sense of satisfaction and pride. The feeling of accomplishment that comes from independently executing a significant home improvement project can be immensely rewarding.
Potential Challenges and Risks
Lack of Expertise:
One of the most significant challenges with DIY installations is the potential lack of expertise. Garage door systems consist of intricate mechanisms, and inexperienced individuals may struggle to comprehend the complexities involved, leading to errors in installation.
Safety Concerns:
Handling heavy materials, working with mechanical components, and dealing with tools pose inherent safety risks. Improper handling or lack of precautionary measures can result in injuries or accidents during the installation process.
Time and Complexity:
Garage door installation demands meticulous attention to detail and a certain level of technical understanding. Inexperienced individuals might underestimate the time and complexity involved, leading to frustration or incomplete installations.
Warranty and Compliance: Improper installation could void warranties provided by manufacturers. Additionally, non-compliance with building codes and safety standards due to incorrect installation might pose long-term risks and legal complications.
While DIY installation presents enticing advantages like cost savings and a valuable learning experience, it also entails risks related to expertise, safety, time, and potential warranty issues. Homeowners should carefully weigh these factors before deciding whether to pursue a DIY approach or seek professional assistance for their garage door installation.
When to Seek Professional Help
While the allure of DIY projects is enticing, certain complexities in garage door installation may surpass the capabilities of even the most enthusiastic DIYers. These complexities often involve intricate mechanisms, precise alignments, and technical expertise that might be beyond the scope of an amateur installer. If you encounter components or tasks that seem beyond your understanding or skill level, it's prudent to consider professional help. Recognizing these limitations early on can prevent potential errors or safety hazards during the installation process.
Safety remains paramount in any home improvement project, especially with garage door installations involving heavy components under tension. Mishandling these elements poses serious safety risks.
Professional installers possess the training and experience to handle these challenges safely. Moreover, there are legal considerations related to building codes and regulations. Professional installers are well-versed in these codes and ensure that the installation complies with local safety standards, potentially preventing future issues or complications related to non-compliance.
Knowing when to
seek professional help is crucial in ensuring the safe and efficient installation of a garage door. When complexities exceed DIY capabilities or when safety and legal considerations become prominent concerns, engaging professional assistance becomes a prudent choice, guaranteeing a smooth and compliant installation process.
Tips for a Successful Installation
Gather Tools and Materials:
Before starting, ensure you have all the necessary tools and materials as per the manufacturer's guidelines. This includes hardware, tracks, panels, springs, cables, and safety equipment.
Read Instructions Thoroughly: Familiarize yourself with the installation manual or guide provided by the manufacturer. Understanding the steps and sequences beforehand can prevent mistakes during the installation process.
Prepare the Installation Area:
Clear the workspace of any obstacles, ensuring ample room for maneuvering during installation. Keep the area clean to prevent debris from interfering with the installation process.
Safety Measures During Installation
- Prioritize safety by wearing appropriate gear, including safety goggles, gloves, and sturdy footwear. Safety gear protects against potential injuries during handling of heavy components.
- Be cautious when handling garage door components, especially springs and cables under tension. Follow safety guidelines to prevent accidents and ensure the safe assembly of the door.
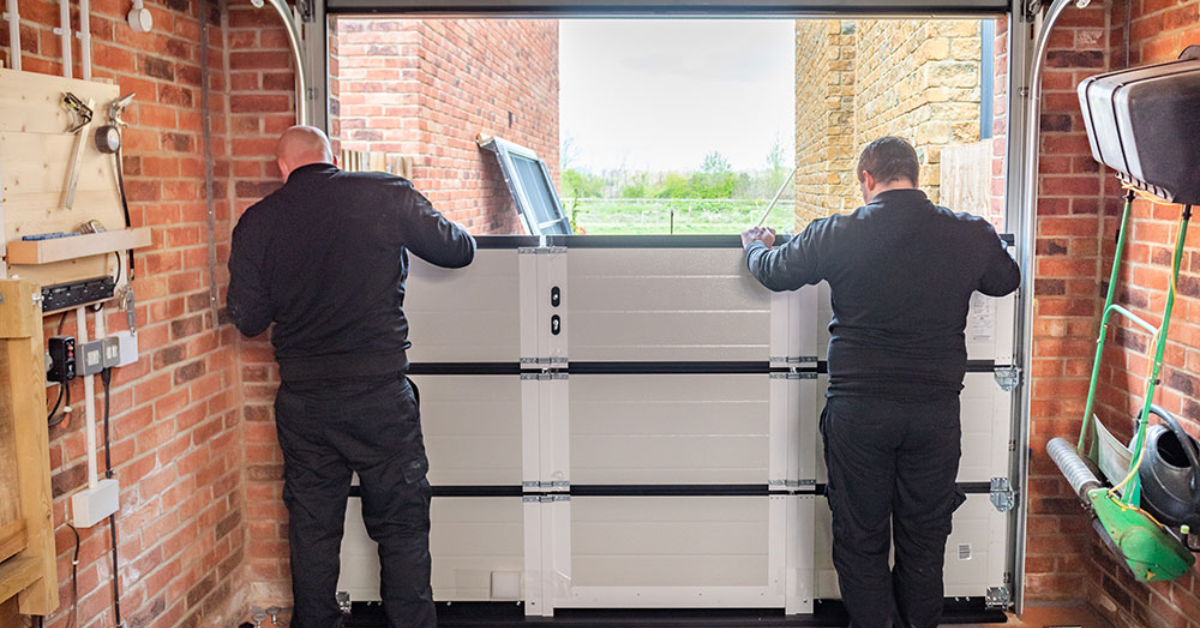
- Consider having a partner or assistant during installation. Some tasks may require extra hands, enhancing safety and efficiency during the process.
- After installation, thoroughly test the door's operation by opening and closing it multiple times. Check for smooth movement and any unusual sounds that might indicate issues.
- Conduct a detailed inspection of all components, ensuring proper alignment and secure fastening. Make necessary adjustments to tracks, springs, and hardware to ensure optimal functionality.
- Perform safety tests to verify that safety features, such as the auto-reverse mechanism, function correctly. Place an object in the door's path to ensure it reverses upon contact.
Following these tips ensures a methodical and safe installation process, from thorough preparations and safety measures during installation to post-installation checks, guaranteeing a successful and functional garage door system.
Cost Comparison: DIY vs. Professional Installation
Calculate the
complete cost of materials, encompassing door panels, tracks, springs, cables, and essential hardware, along with the expenses for tools like drills, wrenches, and safety gear essential for the installation. Assess potential errors during DIY installation, anticipating additional expenses for rectifying mistakes and possible re-purchases of materials or tools in case of errors. Additionally, factor in the value of the time invested in the installation process, recognizing that DIY projects often demand substantial time commitments, an integral part of the overall cost assessment.
Professional installation typically incurs service fees contingent on location, installation complexity, and the selected service provider. Labor costs, incorporating expertise and time, are also factored into professional services. Professional installations often offer warranties covering both labor and materials, promising long-term cost savings and peace of mind. Comparing DIY installation estimates with professional expenses involves assessing material and tool costs, potential DIY mistakes, the value of time invested, service fees, labor costs, and the added benefits of warranties and assured quality in professional services.
Conclusion
The decision for homeowners to undertake a garage door installation themselves hinges on various factors. While DIY projects offer cost savings, learning opportunities, and flexibility, complexities and safety considerations might surpass DIY capabilities. It's essential to evaluate personal skills, the intricacies of the task, and potential risks. For those opting for a DIY approach, thorough preparation, adherence to safety measures, and post-installation checks are crucial. However, considering the complexities involved, seeking professional assistance guarantees expertise, safety, and compliance. Ultimately, homeowners should weigh these aspects carefully and prioritize safety when deciding between DIY installation and professional help for their garage door projects.


