How To Reset Genie Garage Door Opener?

Rabia Tingat • September 16, 2024

Garage door openers have become a modern convenience we often take for granted. Among the most trusted brands in the industry, Genie has been known for its reliability and innovative features. However, like any piece of technology, you may encounter issues that require resetting your Genie garage door opener. Whether you're dealing with a malfunction, need to change your code, or are syncing new remotes, resetting the opener is often a simple solution. This article provides a comprehensive guide on how to reset your Genie garage door opener in a few easy steps.


Why You Might Need to Reset Your Genie Garage Door Opener


There are several reasons why you might need to reset your Genie garage door opener:


  1. Syncing a New Remote: If you’re adding or replacing remotes, you’ll need to reset the opener to pair the new device.
  2. Fixing a Malfunction: A reset can resolve common technical issues, such as the door not opening or closing properly.
  3. Security Concerns: Resetting the opener is a great idea if you've lost a remote or moved into a new home, ensuring that old remotes no longer have access to your garage.
  4. Reprogramming Keypads: If you’re updating or adding a keypad for your garage, you’ll need to reset the system to recognize new codes.


Before You Start | Safety Precautions


Before performing any reset on your Genie garage door opener, take the following safety precautions:

  • Disconnect the Power: Unplug the garage door opener to ensure that no electrical accidents occur during the reset process.
  • Keep the Door Closed: Make sure the garage door is closed to avoid any unexpected movements while resetting.
  • Check the Manual: It’s always a good idea to consult your Genie opener's manual for model-specific instructions.


How to Reset a Genie Garage Door Opener


Genie garage door openers are generally user-friendly and easy to reset. The steps may vary slightly depending on the model, but here’s a general guide to help you get started.

Step 1: Locate the "Learn" Button

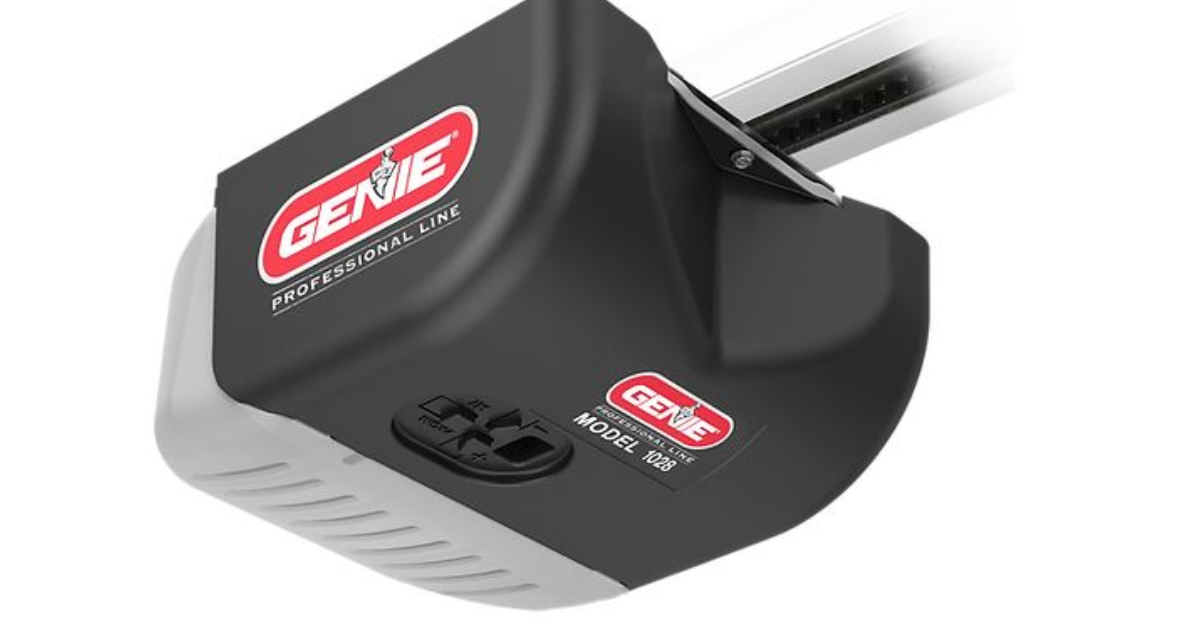
The first step in resetting your Genie garage door opener is to locate the "Learn" button on the opener itself. Typically, this button is on the motor unit, often located near the antenna wire or under a light cover. It may be labeled as “Learn” or simply show a circular symbol. Depending on the model, the button could also be red, purple, or another color.

Step 2: Press and Hold the "Learn" Button

Once you've located the "Learn" button, press and hold it for about 10 seconds. The LED light next to the button should turn off, indicating that the opener has been reset. This action wipes all the programming, including remotes and keypads, from the system's memory.

Step 3: Reprogram Your Remote or Keypad

After resetting the opener, you will need to reprogram any remotes, keypads, or other accessories. Here's how to do that:


  • For Remotes:
  1. Press the "Learn" button again. This time, just press it once and release it quickly.
  2. Within 30 seconds, press the button on your remote that you want to sync with the opener.
  3. The LED light on the motor unit will blink, confirming that the remote is now synced.
  • For Keypads:
  1. Press the "Learn" button on the opener.
  2. On the keypad, enter the new code you wish to use and press the "Enter" button.
  3. The LED on the opener should blink, confirming the new code has been accepted.

Step 4: Test the System

Once you've reprogrammed your remotes and keypads, test the system to ensure everything is working properly. Try opening and closing the door with both the remote and keypad to confirm that the reset was successful.


Troubleshooting Common Issues After Resetting


Even after following these steps, you might encounter some issues. Here are some common problems and how to fix them:

1. The Door Doesn't Respond to the Remote

If the door doesn’t open or close after syncing the remote, make sure you're within range and that the remote's battery is functioning properly. If the problem persists, try repeating the programming steps.

2. The Keypad Doesn’t Work After Reset

If the keypad isn’t working after resetting the system, ensure you’ve entered the correct new code. You may need to repeat the syncing process if the opener didn’t catch the code the first time. Also, check that the keypad battery is not dead.

3. LED Light Doesn’t Blink During Syncing

If the LED light on the motor unit doesn’t blink while syncing your remote or keypad, it could be a sign of a communication issue. Try holding the remote or keypad closer to the opener to strengthen the signal. If it still doesn’t work, a more thorough troubleshooting might be required, such as checking the wiring or replacing the control board.


Tips for Maintaining Your Genie Garage Door Opener


To avoid future issues with your Genie garage door opener, follow these maintenance tips:

  • Regularly Check the Batteries: Ensure the batteries in your remotes and keypads are fresh and working.
  • Inspect the System for Wear and Tear: Periodically check the motor unit, cables, and springs to ensure nothing is worn or damaged.
  • Lubricate Moving Parts: Keep the door’s moving parts lubricated to reduce strain on the opener.
  • Test Safety Sensors: Regularly test the door's safety sensors to ensure they are aligned and working correctly. These sensors prevent the door from closing if there’s an obstruction.


Conclusion


Resetting your Genie garage door opener is a straightforward process that can resolve many common issues, from syncing new remotes to fixing a malfunctioning system. By following the steps outlined above, you can easily reset and reprogram your Genie opener, ensuring that it operates smoothly and securely. Remember to follow safety precautions, and if any issues persist, consulting your opener's manual or reaching out to a professional technician can provide additional guidance.

You might also like

Fix N Go Blog

How To Fix A Squeaky Automatic Garage Door?
By Rabia Tingat February 21, 2025
Stop your automatic garage door from squeaking with these quick and easy maintenance tips. Say goodbye to irritating noises today!
How Long Do Automatic Garage Door Openers Last?
By Rabia Tingat February 20, 2025
Automatic garage door openers have become a staple in modern homes, offering convenience, security, and efficiency. However, like any mechanical system, they do not last forever. If you are wondering, how long do automatic garage door openers last, the answer depends on various factors, including usage, maintenance, and the quality of the opener itself. In this article, we’ll explore the average lifespan of garage door openers, signs that indicate it’s time for a replacement, and tips to extend their longevity. Average Lifespan of an Automatic Garage Door Opener On average, an automatic garage door opener lasts between 10 to 15 years. However, with proper maintenance and minimal wear and tear, some openers can function efficiently for up to 20 years. The lifespan of a garage door opener depends on: Usage frequency – The more you use it, the quicker it wears out. Maintenance – Regular servicing can prolong its life. Quality of the opener – Higher-end models tend to last longer. Environmental factors – Harsh weather conditions can impact longevity. For homeowners who use their garage doors multiple times a day, the opener may wear out faster than the average lifespan. Factors That Affect the Lifespan of a Garage Door Opener 1. Frequency of Use Every garage door opener has a motor and internal gears that undergo stress each time the door opens and closes. If your garage is the primary entrance to your home, daily use can shorten its lifespan. A standard garage door opener is designed to last about 10,000 cycles (one cycle = opening and closing). If you open and close your garage door twice a day, it could last around 13–15 years. However, if you use it more frequently, the lifespan may be closer to 8–10 years. 2. Quality of the Opener Not all garage door openers are created equal. Cheaper models may last around 8–10 years, while premium brands with advanced technology and durable parts can last well beyond 15 years. 3. Maintenance and Repairs Routine garage door maintenance plays a significant role in longevity. Lubricating moving parts , tightening loose hardware, and ensuring the safety sensors are clean can prevent wear and tear. Without regular maintenance, components like springs, chains, and belts can wear out faster, forcing the motor to work harder—ultimately reducing its lifespan. 4. Weather and Environmental Conditions Extreme weather conditions, such as high humidity, freezing temperatures, or excessive heat, can impact the opener’s performance. Cold weather can cause metal components to contract, making the opener work harder. High humidity can lead to rust and corrosion, affecting internal parts. Extreme heat can damage the circuit board inside the opener. If you live in an area with harsh weather, investing in a weather-resistant garage door opener can help extend its lifespan. 5. Power Surges and Electrical Issues Frequent power surges or poor electrical wiring can damage the opener’s circuit board. Using a surge protector can help prevent unexpected failures due to voltage spikes. Signs It’s Time to Replace Your Garage Door Opener Even if your garage door opener is still working, certain signs indicate that it may need a replacement soon: 1. Slow or Noisy Operation: If your garage door moves slower than usual or starts making loud grinding or rattling noises, it could mean the motor or internal gears are wearing out. 2. Inconsistent Performance: Does your garage door opener sometimes refuse to respond? If you notice delays or frequent malfunctions, the circuit board or motor may be failing. 3. Outdated Safety Features: Older garage door openers lack modern safety features like rolling code technology, motion sensors, and smartphone integration. If your opener is more than 15 years old, consider upgrading to a newer, safer model. 4. Increased Maintenance Costs: If you find yourself constantly repairing the opener, it may be more cost-effective to replace it with a newer model rather than spending money on frequent repairs. 5. Random Opening and Closing: If your garage door opens or closes on its own, it could be due to a malfunctioning circuit board or interference from nearby signals. This can pose a security risk, so replacing it may be the best solution. How to Extend the Lifespan of Your Garage Door Opener Want to make your garage door opener last as long as possible? Follow these maintenance tips: 1. Lubricate Moving Parts: Apply garage door lubricant to the chains, rollers, and hinges every 6 months to reduce friction and wear. 2. Tighten Hardware Regularly: Over time, bolts and screws may loosen. Inspect and tighten them annually to ensure smooth operation. 3. Test the Safety Features: Ensure that the auto-reverse mechanism and photo-eye sensors are working properly. Place an object in the door’s path to see if it stops and reverses as it should. 4. Replace Worn-Out Parts Promptly: If you notice frayed belts, worn-out chains, or weak springs, replace them before they break completely. 5. Keep the Tracks Clean: Dirt and debris can cause misalignment. Clean the garage door tracks regularly to prevent operational issues. 6. Install a Surge Protector: A surge protector prevents damage from unexpected power surges, helping to protect the opener’s circuit board. Final Thoughts So, how long do automatic garage door openers last? The typical lifespan is 10 to 15 years, but with proper maintenance, some can last up to 20 years. If your opener is showing signs of wear, struggles to function properly, or lacks modern safety features, it may be time for an upgrade. By following preventative maintenance tips, you can extend its lifespan and avoid unexpected failures. Invest in a high-quality garage door opener, maintain it regularly, and enjoy years of hassle-free operation!
How Do Automatic Garage Doors Work?
By Rabia Tingat February 18, 2025
How do automatic garage doors operate? Explore the technology, from remote control signals to motorized lifting, and understand why they’re a must-have.
More Posts
Share by: