How To Set A Guardian Garage Door Opener?
Setting up a Guardian garage door opener can seem daunting at first, but with the right guidance, it becomes a straightforward process. Whether you're installing a new system or reprogramming an existing one, this step-by-step guide will walk you through the process. With proper setup, your Guardian garage door opener will provide you with convenience, security, and peace of mind.
Why Choose a Guardian Garage Door Opener?
Guardian garage door openers are known for their reliability, durability, and advanced features. They offer quiet operation, enhanced security options, and are compatible with a variety of garage door types. If you’re looking to set up a Guardian garage door opener, you’re making a wise choice that can last for years with proper maintenance.
Tools and Materials You’ll Need
Before you begin, gather the following tools and materials:
- A ladder
- A drill with drill bits
- A screwdriver set
- A tape measure
- Mounting brackets (usually included with the opener)
- The Guardian garage door opener kit
- Remote controls (included with the kit)
- A power source near your garage door
Step 1: Preparing for Installation
Check Compatibility: Before starting, ensure that your garage door is compatible with the Guardian opener. Most Guardian models are compatible with standard garage doors, but it’s important to verify this by consulting the user manual.
Position the Opener: Choose a central location on the ceiling of your garage where the opener will be mounted. The position should allow the opener to move the door smoothly without obstruction.
Power Considerations: Ensure that there is a power outlet near the opener’s mounting position. If there isn’t one, you may need to hire an electrician to install one. The opener should be connected to a dedicated power source to prevent power interruptions.
Step 2: Installing the Guardian Garage Door Opener
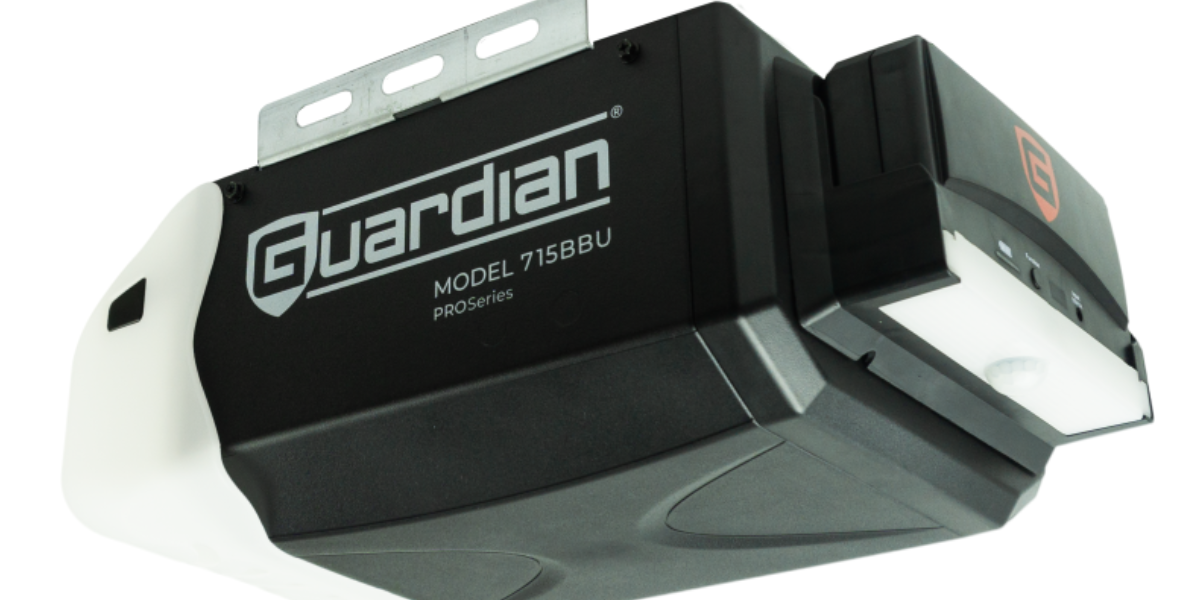
Assemble the Opener: Start by assembling the Guardian garage door opener according to the instructions in the user manual. This usually involves attaching the rail to the motor unit and then securing the trolley on the rail.
Mount the Opener: Using a ladder, lift the assembled opener and align it with the mounting position on the ceiling. Secure the opener to the ceiling using the provided mounting brackets and screws. Make sure the opener is level and stable.
Attach the Trolley to the Door: The trolley is the component that moves the door along the rail. Attach it to the door arm, which connects to the top section of your garage door. This step is crucial as it ensures the door moves smoothly when the opener is activated.
Connect the Safety Sensors: Guardian garage door openers come with safety sensors that prevent the door from closing if there’s an obstruction in its path. Mount the sensors on both sides of the garage door, about 6 inches above the floor. Connect them to the opener using the provided wires, and ensure they are aligned correctly.
Step 3: Setting Up the Remote Controls
Program the Remote: Programming the remote controls is a simple process. Start by pressing the “Learn” button on the opener’s motor unit. This button is usually located near the antenna. Once you press it, an LED light will flash, indicating that the unit is in programming mode.
Within 30 seconds, press the button on your remote control that you want to program. The LED light on the motor unit will flash again, confirming that the remote has been successfully programmed.
Test the Remote: After programming, test the remote by pressing the button to open and close the garage door. If the door doesn’t respond, repeat the programming steps.
Step 4: Adjusting the Settings
Set the Open and Close Limits: To ensure your garage door opens and closes fully, you need to set the open and close limits. These are the points where the door stops when opening or closing.
Locate the limit adjustment screws on the side of the motor unit. Turn the screws to adjust the door’s travel distance. Test the door’s operation and make further adjustments if necessary.
Set the Force and Speed: Guardian garage door openers allow you to adjust the force and speed at which the door operates. This setting is crucial for ensuring smooth and safe operation.
To adjust the force, locate the force adjustment knobs on the motor unit. Turn them clockwise to increase the force and counterclockwise to decrease it. The speed adjustment is usually controlled by a dial or buttons on the motor unit.
Step 5: Testing and Final Adjustments
Test the Safety Features: Once everything is set up, it’s important to test the safety features of your Guardian garage door opener. Place an object in the door’s path and try closing it. The door should stop and reverse direction upon detecting the object.
Check the Operation: Operate the garage door several times using both the wall control and remote control. Ensure the door opens and closes smoothly without any jerks or hesitations. Listen for unusual noises, which could indicate that adjustments are needed.
Final Tightening and Inspection: Finally, go over all the screws, bolts, and connections to ensure everything is securely tightened. Inspect the entire system to confirm that all components are installed correctly and are functioning as intended.
Conclusion
Setting up a Guardian garage door opener is a manageable task that can greatly enhance the convenience and security of your home. By following these steps, you can ensure that your garage door operates smoothly and safely. Regular maintenance, such as lubricating the moving parts and checking the settings, will help extend the life of your Guardian garage door opener.


