How To Adjust Door Closing On Liftmaster Garage Door Opener
Garage door openers like LiftMaster are known for their reliability, but occasionally, you may encounter issues where the door doesn’t close properly or stops short of the floor. This can lead to security concerns or even damage to your garage door. Thankfully, adjusting the door closing on a LiftMaster garage door opener is a simple process that can be done in just a few steps. In this guide, we’ll walk you through the process, making it easy for you to get your garage door functioning perfectly again.
Why Adjusting the Door Closing is Important
Before we dive into the steps, it’s essential to understand why adjusting the door closing on your LiftMaster opener is crucial:
- Proper Sealing: A garage door that doesn’t close fully may leave a gap at the bottom, allowing drafts, water, or pests to enter your garage.
- Security: A door that doesn’t close properly can leave your home vulnerable to intruders. Adjusting the closing position ensures that your garage is secure.
- Preventing Wear and Tear: Misalignment or improper closing can cause strain on the door opener and the door itself, leading to unnecessary wear and tear.
Tools You’ll Need
To adjust the closing position of your LiftMaster garage door opener, you’ll need:
- A step ladder (if your garage door opener is mounted high)
- A flathead screwdriver
- The owner’s manual for your LiftMaster model (optional but helpful)
Understanding the Adjustment Mechanisms
LiftMaster garage door openers have two primary mechanisms for adjusting the closing and opening positions:
- The Travel Adjustment Screws: These screws adjust how far the door travels when opening or closing. There are usually two screws: one for adjusting the closing limit and the other for adjusting the opening limit.
- The Force Adjustment Screws: These screws control how much force the motor applies when opening or closing the door. Adjusting the force can help the door close more smoothly or prevent it from reversing too soon.
Now, let’s move on to the step-by-step process of adjusting the door closing on your LiftMaster garage door opener.
Step-by-Step Guide to Adjusting the Door Closing
1. Locate the Adjustment Screws
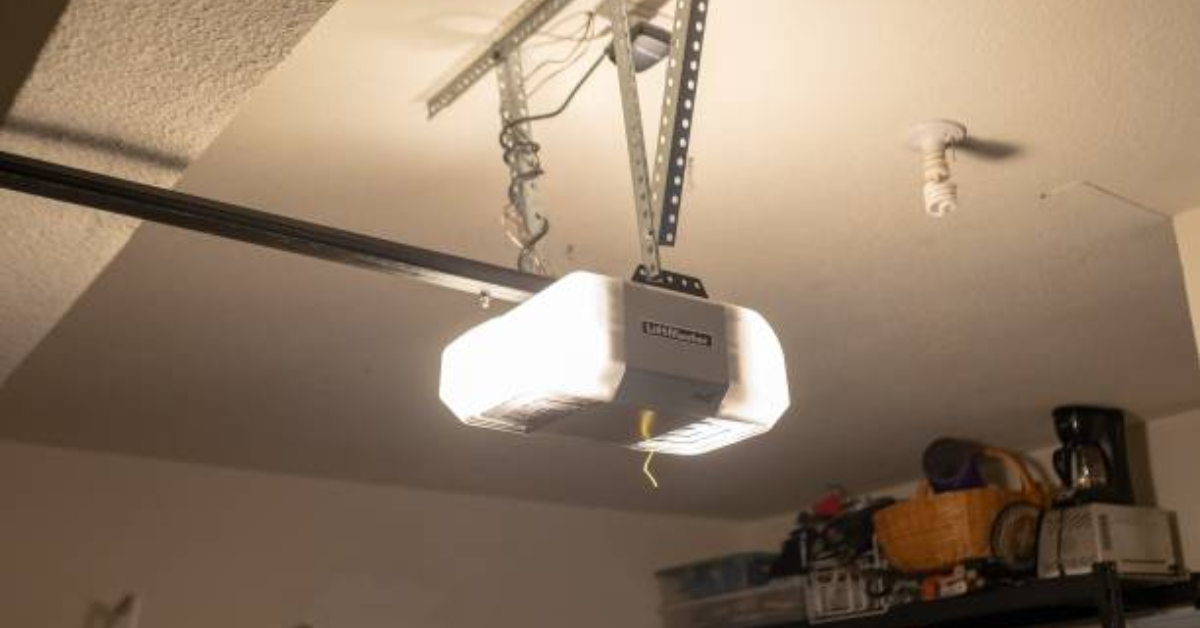
First, locate the adjustment screws on your LiftMaster garage door opener. These are usually found on the back or side of the motor housing. You may need to use a step ladder to reach them. Look for a label that indicates "Up/Down" or "Open/Close" limits.
Most LiftMaster models have two adjustment screws:
- One screw controls the opening limit, which determines how far the door opens.
- The second screw controls the closing limit, which determines how far the door closes.
2. Test the Current Door Closing Limit
Before making any adjustments, test how far your garage door currently closes. Use the wall-mounted control or a remote to close the garage door and observe whether it hits the floor completely, stops short, or goes beyond the intended point.
If the door doesn’t close fully or stops too soon, it’s time to adjust the closing limit.
3. Adjust the Closing Limit Screw
Using a flathead screwdriver, turn the closing limit screw to adjust how far the door travels when closing. Most LiftMaster models have arrows next to the screws to indicate which direction increases or decreases the door’s travel distance.
- Turn the screw clockwise to decrease the closing distance if the door is going too far and reversing after hitting the floor.
- Turn the screw counterclockwise to increase the closing distance if the door is stopping short of the floor.
Make small adjustments (usually no more than a quarter-turn) and then test the door again.
4. Test the Door Again
After making a small adjustment to the closing limit, use the remote or wall-mounted control to test the garage door. Watch carefully as it closes to see if the door now meets the floor properly.
If the door still isn’t closing correctly, make further adjustments using the closing limit screw, turning it in small increments until the door closes fully without reversing or leaving a gap.
5. Adjust the Force (If Necessary)
If adjusting the travel limit doesn’t solve the problem, you may need to adjust the force that the opener uses when closing the door. The force adjustment controls are usually located near the travel limit screws.
- Increase the force if the door reverses before hitting the floor.
- Decrease the force if the door is closing too hard, which could damage the door or the opener.
Make sure to adjust the force in small increments, testing the door after each adjustment.
6. Test the Safety Reversal System
After you’ve adjusted the closing limit and force, it’s essential to test the safety reversal system. This system prevents the door from closing on objects or people by automatically reversing if it detects an obstruction.
To test the safety reversal system:
- Place a 2x4 piece of wood or another object under the door.
- Close the garage door using the remote or wall-mounted control.
If the door touches the object and then reverses, the safety reversal system is working correctly. If it doesn’t reverse, adjust the force again or consult the owner’s manual for troubleshooting tips.
Common Issues and Troubleshooting
While adjusting the door closing on your LiftMaster garage door opener is usually straightforward, you may encounter some common issues. Here are a few troubleshooting tips:
- The door won’t close all the way: This is often due to improper closing limit settings. Adjust the closing limit screw counterclockwise to increase the door’s travel distance.
- The door reverses before hitting the floor: This can happen if the safety reversal system detects an obstruction or if the force is set too low. Check for any objects blocking the door’s path and adjust the force as needed.
- The door slams shut: If the door is closing too hard, reduce the force by adjusting the force screw in small increments.
Maintaining Your LiftMaster Garage Door Opener
Once you’ve successfully adjusted the closing limit, it’s important to maintain your LiftMaster opener to ensure smooth operation:
- Lubricate Moving Parts: Regularly lubricate the garage door’s hinges, rollers, and tracks to reduce friction and prevent wear.
- Check the Sensors: Ensure the photoelectric safety sensors are clean and aligned properly to avoid issues with the door closing.
- Test the System Periodically: Test the door’s closing limits and the safety reversal system every few months to catch any potential problems early.
Conclusion
Adjusting the door closing on your LiftMaster garage door opener is an essential step in ensuring your garage door functions safely and effectively. By following this simple guide, you can make sure your door closes properly, preventing gaps, enhancing security, and extending the life of your garage door opener. Regular maintenance and testing will keep your LiftMaster opener working smoothly for years to come.


